Photo

You are currently browsing the archive for the Photo category.

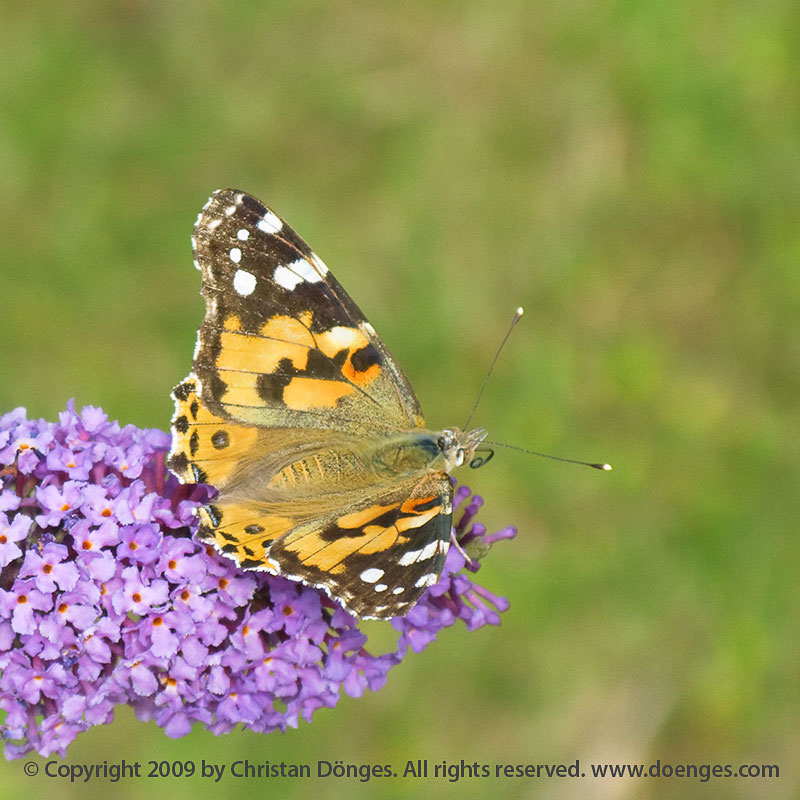
While out walking I spotted this Small Tortoiseshell Painted Lady butterfly sitting on a purple lilac:

Painted Lady butterfly sitting on a purple lilac..

Painted Lady butterfly sitting on a purple lilac.

For some reason, lilacs seems to drive butterflies in general and these in particular into an ecstatic frenzy: the butterflies come from all over, congregate on the blossoms, and flutter about as if delirious with pleasure. I guess the nectar from the blossoms is really, really tasty.

Photographically speaking, the image was quite a challenge to obtain: I was carrying only a Canon G9 at the time, so I had to get quite close to the butterfly to be able to photograph it. And even though the butterfly was having a really good meal, it clearly did not want to become a meal for someone else – so it was moving about at a brisk pace and did not allow me to get very close at all.

I cranked out the zoom all the way and held the camera at arms length, which at least allowed me to get close enough to get a significant part of the frame to show butterfly, not background.

The problems did not end here: when cranked out fully, the G9 is at f4.8 and the late afternoon light was not bright enough to allow a short enough exposure to freeze the butterflies motion at ISO 80, which is the lowest ISO the G9 will allow. (I usually use ISO 80 to reduce noise to the minimum.) In this case, I decided that noise would be less of a problem than motion blur and set the ISO to 200 to allow a 1/320s exposure.

The result is adequately sharp. If you look very closely, you can tell that sharpness begins to drop off near the butterfly head. Just a little bit softer and I would have tossed the image – I guess that having a small sensor (and therefore great depth of field) was good in this case.

Update 06-MAY-2010: Reader J Danson kindly pointed out that this is not a Small Tortoiseshell but rather a Painted Lady. He’s right, so I’ve fixed the posting but have left the URL intact.

Spider in its Web

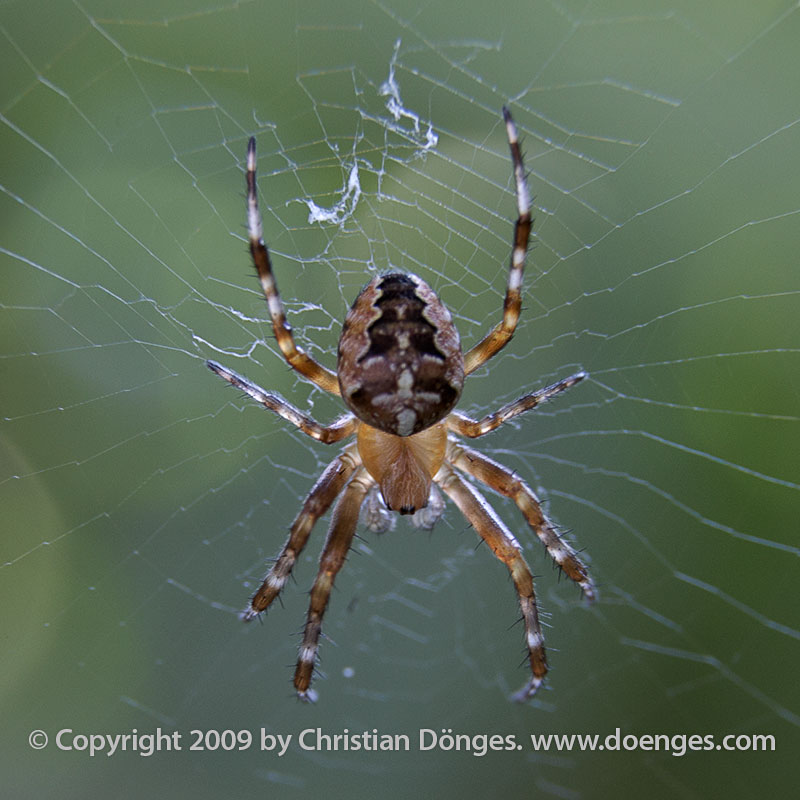
The garden spider or cross spider is one of the more common (and quite harmless) spiders that builds large circular webs. This one is a european garden spider or diadem spider (Araneus diadematus) which my daughter found in our garden:

Diadem Spider in its web.

Back lit diadem spider in its web.

In this image, I like the way the sunlight shines through the lighter parts of the spiders body, making it appear that the spider glows from within.

As I was watching the spider and photographing it I saw it catch three small flies in its web. I guess that pretty soon this spider is going to be quite a bit larger …

Calendula blossom

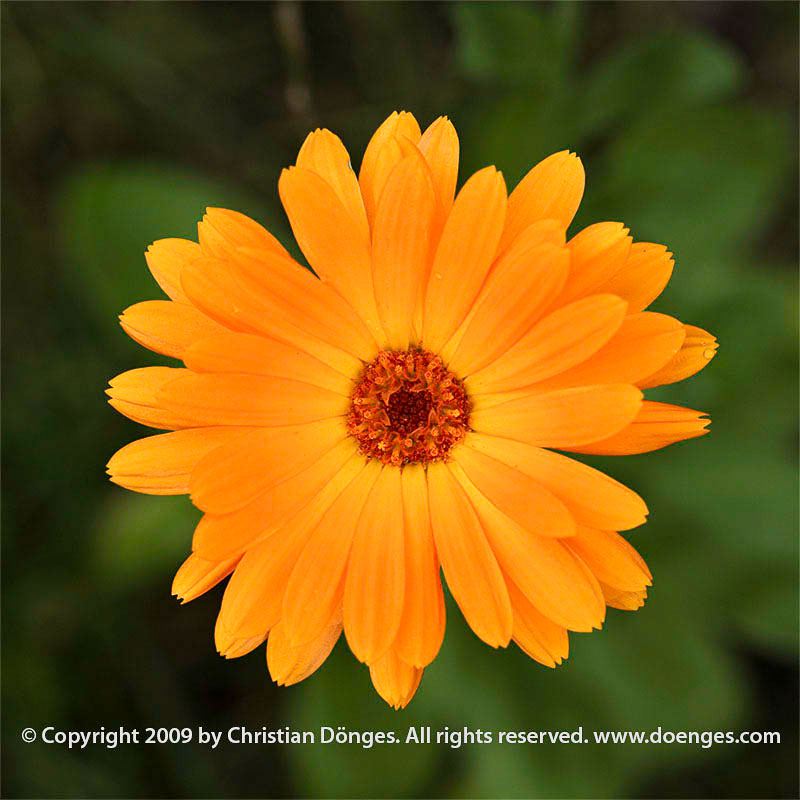
This calendula blossom opened up early in the morning, which is supposed to be a sign of good weather.

Calendula blossoms with rain drops.

Calendula blossom with rain drops.

For some strange reason it started raining as I was taking the picture (you can see some rain drops). It is good that I found the information about the “sign of good weather” on wikipedia because that means it must be true. 🙂

I was invited to be the official photographer covering the performance of a childrens musical. Over 130 kids performed on stage – everything else was a huge volunteer effort by the parents. It was great fun to see how enthusiastic the kids (aged 6 to about 19) were and how much fun they were having on stage!

It was also a great learning experience, since this was the first time I have done any stage photography. Out of over 1000 exposures I got about 500 that are decent and 150 that I consider good. The main lesson here: consider depth of field. It will not do to shoot several people with an aperture of f2.8 if they are not exactly the same distance from the camera.

The second lesson is that I need to sort out the model releases before, not after, the event. Now I am identifying the performers and contacting them or their parents directly for permission to publish – it would have been much easier if we had sorted this out when the kids signed up to participate.

Here are “Wolfgang 4” (Mozart as a man) with his mother:

Performers 'Wolfgang 4' and 'Mozarts Mother' in the musical.

Performers 'Wolfgang 4' and 'Mozarts Mother'.

As I get the releases straightened out, I will post more images of the event. Subscribe the RSS feed to be notified of updates.

In the last post I showed a picture of a marmelade fly on a yellow flower. I would like to revisit that picture to show how much an image can change depending on how – and with which tools – it is processed.

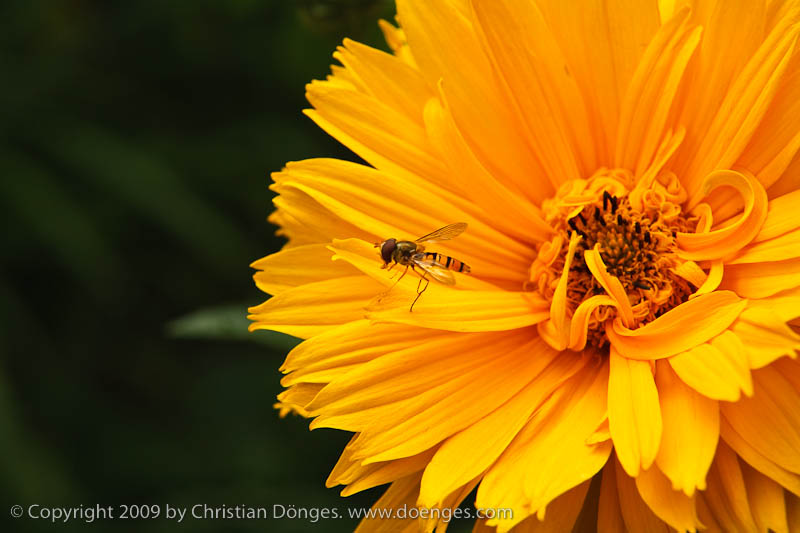
The original image was captured in RAW format. I then processed it in Adobe Lightroom 2. The result is this:

A marmelade fly rests on the petals of a large yellow flower before taking flight.

Marmelade Flies on a Yellow Flower processed in Adobe Lightroom 2

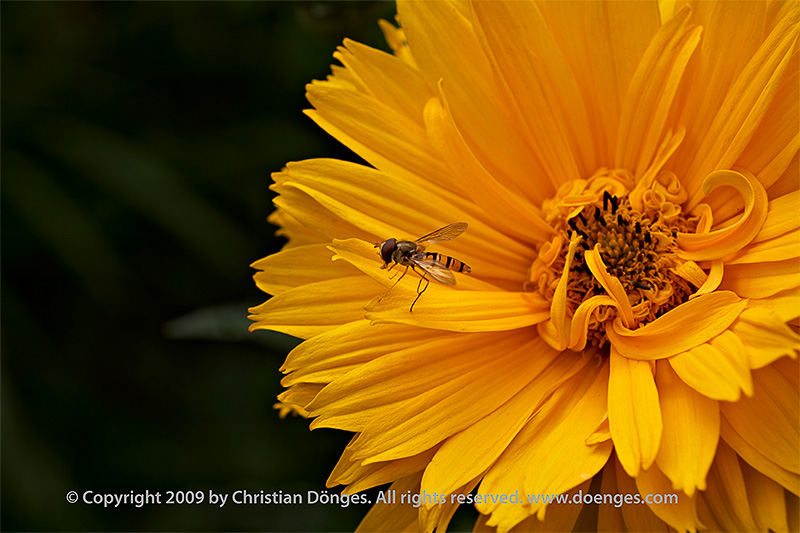
While I was reasonably happy with the image, I had to do some testing in Capture One Pro and decided to see if I could do better. I have long thought that Capture Ones color rendition is much better than Lightrooms. But judge for yourself:

A marmelade fly rests on the petals of a large yellow flower before taking flight.

Marmelade Flies on a Yellow Flower processed in Capture One Pro and Photoshop

Quite a difference, don’t you think? The first rendition looks almost like a painting while the second is so real you can almost touch it.

So how was it done?

I first opened the file in Capture One and set the exposure so that none of the color channels would clip. This part is identical to what I did in Lightroom. Note that the yellows are a bit darker in the C1 rendition than in LR. I then exported a 16-bit TIFF file to Photoshop from C1.

In Photoshop I created a mask to darken the green part to the left of the flower using a curve. A second mark darkened the bright leaf to the left and below the marmelade fly. Then I removed some spots from the yellow petals which were really there (i.e. not dust on the lens or sensor) but which I did not like. All of these steps are identical to what I did in Lightroom except that I did not darken the single bright leaf in LR.

I then added a watermark copyright note and reduced the size of the file. Finally, I used Pixel Genius PhotoKit Sharpener for output sharpening. All of this is fully automatic during the Lightroom export.

In total I spent about five minutes in Lightroom to get a decent image. I spent about half an hour in Capture One and Photoshop to get an excellent image. There is clearly a trade-off time for quality here.

That is why I usually perform all my culling, keywording, and rough editing in LR. When I have identified the handful of images with real potential I spend more time on them in C1 and PS. Now if only I could take the LR settings and use them in C1 so that, for example, I do not have to re-crop …

« Older entries § Newer entries »